How to Fix Ripped Car Leather Seats
Car leather seats add a touch of luxury and sophistication to any vehicle. However, over time, these seats can suffer from wear and tear, including rips and tears. If you find yourself with ripped car leather seats, don’t fret! With a little effort and the right approach, you can restore your seats to their former glory. In this article, we will guide you on how to fix ripped car leather seats step by step.
Assessing the Damage
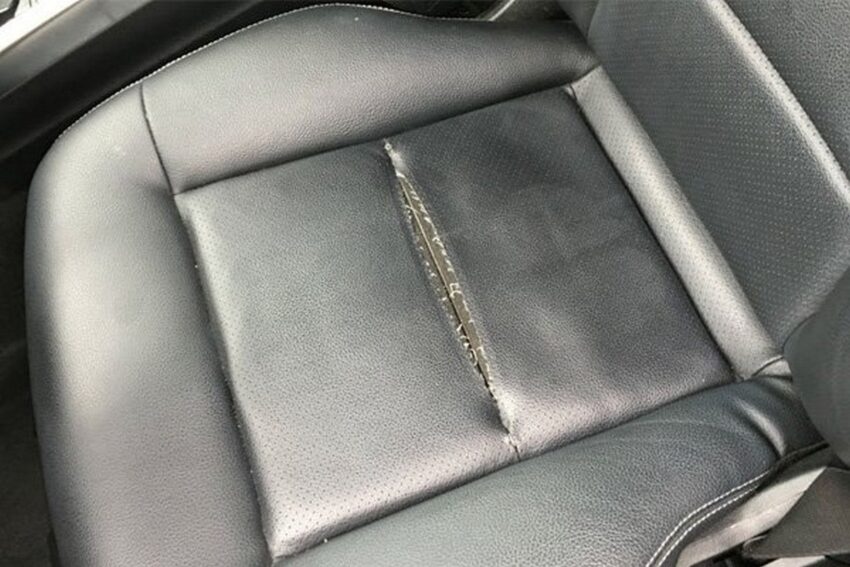
The first step in fixing ripped car leather seats is to assess the damage. Carefully examine the rip or tear to determine its size and severity. Small, minor rips are often easier to repair, while larger tears may require more extensive work. It’s important to gauge whether the damage can be fixed using DIY methods or if it requires professional intervention.
While focusing on the condition of the car seats, it’s also crucial to consider the overall well-being of your vehicle. This includes examining other components, such as the fender flares. Speaking of which, some car owners wonder, do fender flares cause rust? The answer is that Fender flares can indeed contribute to rust-related issues in certain cases. If they are not installed correctly or if they trap moisture and debris between the flare and the body of the car, it can potentially lead to rust formation over time. Therefore, it’s important to regularly inspect and maintain fender flares to prevent such problems and ensure the longevity of your vehicle’s exterior.
Gather the Necessary Tools and Materials
Before you embark on repairing your ripped car leather seats, gather the necessary tools and materials. You will need a leather repair kit, which typically includes adhesives, fillers, color compounds, and application tools. Additionally, gather a clean cloth, rubbing alcohol, a hairdryer, and fine-grit sandpaper. Having these items on hand will ensure a smooth and efficient repair process.
Preparing the Area
Before you begin the repair, it’s crucial to prepare the ripped area properly. Start by cleaning the damaged area using a clean cloth and rubbing alcohol. This will remove any dirt, oils, or debris that could interfere with the repair. Once the area is clean, gently sand the edges of the rip to create a smooth surface for the adhesive and filler.
Repairing Small Rips and Tears
For small rips and tears, a leather repair kit can work wonders. Follow the instructions provided with the kit to apply adhesive to the torn edges, ensuring they are properly aligned. Next, use the filler included in the kit to fill the ripped area. Smooth out the filler using a spatula or the back of a spoon, and allow it to dry completely. Once dry, sand the filled area lightly to achieve a smooth finish. Finally, apply a color compound that matches the surrounding leather, blending it in with the rest of the seat.
Repairing Larger Rips and Holes
If you’re dealing with larger rips or holes, a different approach is required. Cut a patch or obtain a replacement piece of leather that closely matches the original seat material. Trim the patch to cover the damaged area, ensuring it overlaps the rip by at least half an inch on all sides. Apply adhesive to both the patch and the ripped edges, press them together firmly, and allow the adhesive to dry. Once dry, sand the edges of the patch to achieve seamless integration with the surrounding leather. Apply color compound to match the rest of the seat, and blend it in using a soft cloth.
Blending and Color Matching
After repairing the rip or tear, it’s essential to blend the repaired area with the rest of the seat and achieve a color match. Use the color compound from your repair kit or a leather dye that matches your car’s interior. Apply the color compound or dye sparingly to the repaired area, gradually building up the color until it matches the surrounding leather. Use a soft cloth to blend the color and achieve a seamless result.
Applying Leather Conditioner and Protectant
To maintain the integrity of your repaired car leather seats, it’s crucial to apply leather conditioner and protectant regularly. These products help keep the leather supple, prevent cracking, and protect it from future damage. Follow the instructions provided with the conditioner and protectant to apply them correctly and extend the lifespan of your seats.
Preventative Measures
Prevention is always better than cure, and the same applies to car leather seats. To avoid future damage, consider taking preventative measures. Avoid sharp objects and excessive weight on the seats, as these can cause rips or tears. Regularly clean and condition your car’s leather seats to keep them in optimal condition. Using seat covers or protective pads can also provide an additional layer of defense against potential damage.
Conclusion
Fixing ripped car leather seats doesn’t have to be a daunting task. You can restore your seats and prolong their lifespan with the right tools, materials, and techniques. Remember to assess the damage, gather the necessary supplies, and follow a systematic approach to repair the rip. By taking proper care of your car’s leather seats and addressing any damage promptly, you can enjoy a comfortable and visually appealing interior for years to come.
You may like to read Where to Visit in Portugal at Night