How to Clean Your BMX Hub Easy Guideline
Here’s a little knowledge for all you beginners out there before you read this article before you even get yourself intrigued into this article.
I should also mention that this is not for your brand-new hubs. One of the most common things to do for a lot of beginners is right.
What to Avoid
When they buy a new BMX bike, they try keeping the bike spec and span and really. Just like if you were to get a brand-new car, you want to keep that car as clean as you can, until you really don’t care about it. That much anymore. The same thing goes with bikes. A lot of people buy brand new adult BMX bike and they try keeping them as clean as they can.
But you know, it gets. Sturdy over time and with this, a lot of beginners tried to clean the inside of their hubs, not knowing what to do, not knowing how to fix it and the not only thing to say is don’t fix it if it’s not broken.
Fix the Hubs
Yeah. I know this. Isn’t fixing your hubs, but a lot of hubs get broken because they’re dirty and this is how to prevent that. So, if you have a brand-new BMX bike, don’t, don’t even just check this article.
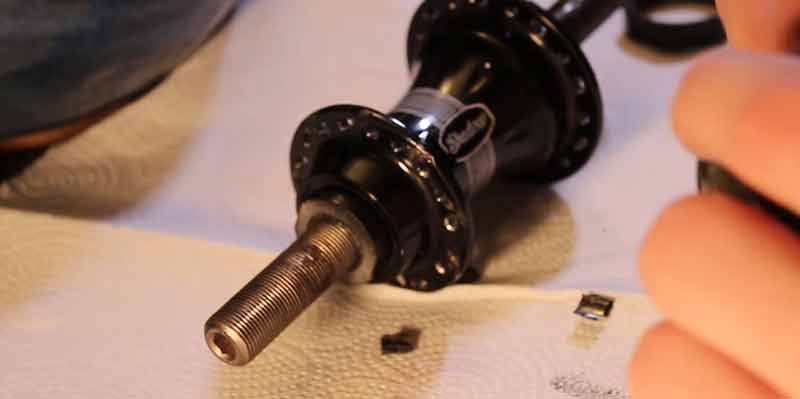
Now we’re going to take off what is called the cone washer, the lock nut that keeps your whole entire hub, and place this little nut right here that keeps the whole driver together.
So, some tools you may want to consider are an Allen key set and something just to basically get the lock nuts off.
We’re gonna after you have that done, usually, your driver just pops right out just like this. So, unfortunately, this whole entire hub broke, got tons of new hub parts to fix it. Hopefully, it all fits because they don’t really sell this anymore.
You have to have all those out and all the Paul’s or Springs are out. You can really see like these, these are pretty damaged Springs right here. These, these are not good.
These are the Springs you don’t want. You guys really want to do and concentrate on is just getting all this excess dirt.
Take the grease off your hub and you know that deal grease gets dirty. So on. I’ll just pretty much take off all that excess grease.
That’s just ruining your hub and from there, what you can use, but don’t be afraid to use it as Windex.
What you don’t want to do is use Windex on this side where you see a bearing. Do not get any Windex, water, anything in this bearing because it will potentially break it.
So stick on the part where it has the Pauls and Springs attached to it. Now with this, I’m not going to get into all that. I’m just going to show you guys to really quickly wipe it down.
Then after that various assorted items and take some multi-duty, complex, high-temperature grease, pop it open, take a little bit, not allowed because this can really damage your hub.
Cleaning
Now, the reason why we are doing high-temperature grease is that as you guys can see with these Pauls and Springs, they kind of got chipped down.
It’s not looking so pretty for them and they’re kind of at an angle that’s because there was so much friction and there are so old to the point where the metal actually melted or gap friction away.
So we are going to take high-temperature grease and so that does not happen again grease it up and boom from there you got a perfectly good, amazing lush, and awesome moist driver.
Now we are going to pretty much take out all these new parts because of dance comms. So kindly individually put every single Paul and spring in a bag.
The next step is to put all these Pauls and Springs back after we clean the hub. Now, a lot of people will be tempted to bend over the Springs a little bit more to make the hub louder, but we’re not going to do that because it can potentially damage your hub after like 30 years.
We’re not going to do that anyway. So, after further inspection of your driver, you figure out everything’s fine and everything’s good.
There’s no access there and all the pauses’ Springs seem to be somewhat the same springiness. The next thing you want to do is you will want to go over to your hub. Look at your hub shell, and look inside your hub cell.
This is a ratchet rang. I had to get a replacement one, but for most people, it’s integrated. So with this, what you want to do is just make sure there’s no access grease inside the hub.
As I could see right now, there is a little bit of dirt, a little bit of excess grease that doesn’t really need to be there that we could regress.
So what you’ll do is you’ll take the actual hub shell. And you’ll just wipe it off. Usually, people use Windex, water, anything that will work.
But for the most part, you just want to make it look brand spanking new. So long story short, if you suspect that one of your bearings is broken.
If you were sitting here messing with your hub and you kind of feel a little crunch, you feel a little something, something not good in the hub.
What you will want to do is take your hub. And just throw it out in the trash because you’re screwed now. That’s what the BMX companies want you to think to do so you can buy a new hub.
In most cases. That’s not true to be completely honest with you guys.
When I was actually researching the parts to get this hub, I found out almost everything that I needed to fix this hub was discussed, continued, and or broken or not sold anymore.
Seriousness guys. Just make sure everything’s good. And with that, stay tuned for the next article where I actually lace up this very hub to a G sport roll cage.
Conclusion
if you guys are new and you guys don’t know what I’m talking about, I usually throw some parts on my website usually every week.
Thank you, guys, for watching this article and want to know more about check OutdoorXsports share it with your friends.