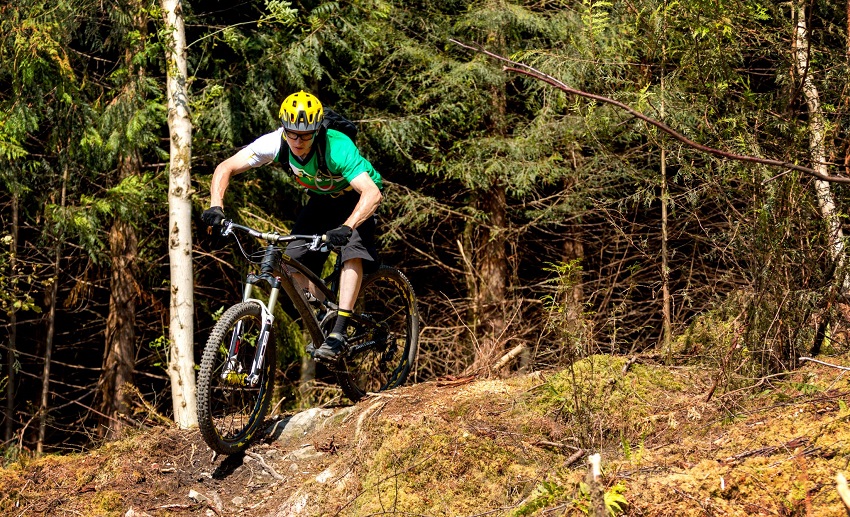
How to brake in Mtb: Learn the technique with the advice and the right configuration
How to brake in Mtb and know how to do it well is fundamental for our driving style. Proper braking helps us to make curves with composure, avoid obstacles, and to stop in an instant when we encounter dangers on the path. Braking is more than just pulling the lever. Braking is one of the gestures that you learn first and precisely because it is also one of the most underestimated at the base of the technique. So how to brake in Mtb? There are some tricks that allow you to do it in the best way, thus increasing safety and fun. Create your configuration and learn the modulation secrets to improve the braking of your MTB, together with us.
Correct configuration
Brake configurations can be quite controversial and often differ by geographic region. We’ll help you decipher what the various configurations can offer, narrowing down your choice based on what’s best suited to your needs. Have a look at the Moongoose mountain bike.
1. Position of the brake
Isn’t the one behind right? Well, it depends. In most countries where traffic is on the right side of the road, the right lever operates the rear brake. In many countries where vehicles drive on the left side of the road, cyclists operate the rear brake via the left lever (this is also referred to as “motorcycle style”). Which orientation is more correct is a matter of debate, but in the end, what matters is to manage the brakes in the most comfortable way. Do you have any concrete reason why you think cyclists should only use the brakes one way? Let us know in the comments.
Before using the brakes and especially the rear brake, bring your weight towards the rear of the bike. Once the center of gravity has been moved further back and down, pinch with the rear brake. Pushing the heel down helps maintain control and further lowers the center of gravity.
2. Flat or inclined?
The wrists are stronger when they are at a slight angle. This angle allows them to move easily and maintain control of the bike. This means that if you drive mostly on steep terrain, the brake lever should be flatter than the handlebar, so you can reach it while your wrist is further back on the grip. Conversely, a more inclined lever position will keep your wrists further forward on the knob, which minimizes flexing and provides a number of advantages when driving uphill. Play around with the configuration and find the one you think is most correct.
To find the right angle, sit on the bike in a comfortable position with your wrist almost straight, leaving a slight natural flex, and adjust the brakes so that your index finger rests comfortably on the lever. Keep in mind that it is advisable to adjust the position a couple of times a year, depending on the strength of the arms, the frequency of the exits, and how the driving changes over the seasons.
3. Distance
Most bikes come out of the box with the brake levers close together against the grips. However, while riding, it is more beneficial to have only the index finger resting on the brake lever, allowing the remaining fingers to maintain contact with the grips to improve control of the bike. To achieve this configuration, we recommend moving the brake levers far enough away from the knobs, just enough to allow your index finger to reach them comfortably, avoiding contact with other fingers when fully engaged. Make sure the lever does not pinch your middle and ring fingers when fully compressed, avoiding accidental injury in the event of an accident. You may also like to read, Is indoor cycling a good exercise?
4. Contact points
Most modern brake levers have a hook shape, perfect for resting your index finger while driving. In order for your finger to sit comfortably, we recommend adjusting the distance of the levers so that the index finger is relaxed when it rests on the end and does not stretch too far to apply the brakes. Adjust the lever distance to find the ideal spot where there is enough grip without requiring excessive stretch.
What is brake modulation?
Chances are you’ve heard this term, often brought up on trails, in bike shops, or in articles devoted to technique. But what is braking modulation really? Simply put, modulation is the extent to which the brake lever is pressed. At one end of the spectrum, you have zero lever pressure, lots of traction, and a freely spinning wheel. At the other end, the brakes are fully locked, the wheel doesn’t spin, and there’s no traction at all.
Learning when to apply the brakes or when to slowly apply pressure to the lever to stop without skidding is a game changer. We have come up with an exercise to help you experiment with modulation. It’s a perfect exercise for days when you don’t have time for a big ride or when you’re waiting for your friend to join you on the trail. All you need is a gently sloping road, a grassy hill or a double track trail, and a set of good-sized poles to use as a placeholder.
Pick the spot
Pedal to the top of the slope and drop a stick to mark where you will start pedaling on each lap; then, go all the way down the slope and drop a second stick to mark where to start applying the brakes fully. Make sure you have enough space to reach a good speed.
Round 1
Start at the top of the hill and reach the second stick; then, apply both brakes to stop as quickly as possible. Leave another stick to mark where you stopped.
Round 2
Go back to the top of the hill and repeat the previous steps, but this time only apply the rear brake as hard as possible until you slip. Notice the difference and mark how far you’ve come.
Round 3
Repeat the steps of the second round, but this time modulate the rear brake to avoid slipping. Leave another stick to mark where you stopped. What you will find is that stopping is more efficient when you apply the rear brake gradually than when you apply it to the maximum. If not, go back to the start and repeat again.
Round 4
Now that you’ve done a few laps with the rear brake, it’s time to get comfortable with the front brake. Repeat the exercise a few times, applying only the front brake and marking where you stop. You will notice that you are starting to stop faster than using just the rear brake.
The reason why stopping is faster using only the front brake is related to physics. When the braking force (the front rotor and brake caliper) is in front of the mass (your body and your bike), the weight shifts to the front brake and creates more stopping force than when the braking force has to hold weight.
Final round
Return to the top and repeat the exercise again, modulating both brakes without slipping. During the exercise, you should see improvement in stopping speed and learn to better control the brakes. Check these tips also https://www.globaeroshop.com/clipless-pedals-or-mountain-biking-platform/